Showing posts with label Tina Luu. Show all posts

Monday, November 23, 2015

The Big Holiday Pie Roundup: You Can Do It!


With Thanksgiving coming up later this week, I thought it would be helpful to do a roundup of all my pie-baking posts. Pies--or more specifically, pie crusts--seem to give people the most angst of all Thanksgiving dishes.

I've been baking pies since I was a teenager, more or less successfully. But over the years I've gained confidence, especially since 2011, when I went on a tear talking with San Diego pastry chefs about their pie-baking techniques. I learn, I try, I repeat. I learn more, try something new, and either go with it or revert back to the other technique. Regardless of what I do, I feel like I understand the science of it more and so can correct mistakes or make my own choices.

Over the years, I've met with Michele Coulon (Michele Coulon Dessertier), Rachel Caygill, Tina Luu, Kathleen Shen (Bake Sale Bakery), and Nick Brune (Local Habit). Finally, if the whole crust thing is still too intimidating--or you're just not into crusts, you can try my apple pie crisp.

First up is Michele Coulon. I loved the pie-baking experience with her. She basically just put me to work and had me make the pie as she instructed me. Michele is all about the butter--unsalted European butter. She has some very fundamental opinions about baking apple pies--everything from what type of pie plate to use and avoid to whether or not to add spices. So take a read. You'll find a great mentor here, like I did.


Then, there's Rachel Caygill, formerly the pastry chef at Bankers Hill. What a terrific teacher. We miss her terribly in San Diego, but while she was here she gave a group of bloggers a pie-baking class and invited me. I learned about making crusts in a very traditional way with a combination of butter (for flavor) and lard (for flakiness). You'll want to try this option, so read about it here.


Tina Luu recently left her long-time position as instructor at the Art Institute. Before she left, she invited me (or I invited myself--I can't remember) to her pie and tart class. What a revelation. Here's where I began to learn the science of pie doughs, like the differences between pie and tart doughs, how to create a flaky crust, and what options there are to do it. We also learned a lot about fillings and layering flavors. Dig deep here.

Kathleen Shen invited me to her pie-baking class at Bake Sale Bakery earlier this year. I came to the class thinking that I already had the skills, but Shen is a terrific teacher and the hands-on class she runs is irresistible. She gives you the confidence to go out and bake pies for every occasion. I learned so much here, mostly about technique. Like not fully incorporating butter and shortening into the flour when mixing because,"You want those pieces of fat because they create pockets of steam and thus flakiness," she explained. "And you want to minimize how much you work the dough to avoid developing gluten. Then the dough gets tough. Instead, it should just hold together." Here's another piece to read if you can't take the class. (Take the class!)


Now Nick Brune didn't teach me how to bake a pie crust, but he did share his secrets for baking a traditional Southern Buttermilk Pie. It's easy to make and will thrill your holiday guests as a change up from traditional custard pies. Add this to your repertoire.


Alright, maybe neither all these chefs nor I haven't convinced you. Or, maybe, like my dad, you don't love pie crusts--you just love the filling. For you I offer the apple crisp. This recipe makes baking a dessert easy and still feel traditional.

Caron's Crisp Mix
(printable recipe)

What I love about this recipe is that I can make the mixture in advance and store it in the freezer. Then I can create an individual serving for myself or a large dessert for company, using whatever fruit is in season. In cool seasons, I peel, core, and slice a Granny Smith apple. Then I toss the slices in a small amount of flour and sugar, and place the slices in a large ramekin or individual pie dish that I lightly coated with baking spray or vegetable oil. I’ll pull out the crisp mixture from the freezer and spoon out just enough to top the fruit, then bake. In less than an hour I have a pretty healthy, fiber-rich dessert.

Makes 8 to 10 servings, depending on how much you use per serving

Mix together:

2 cups quick cooking oats
1 cup toasted walnuts, chopped
1 ½ cups lightly packed brown sugar
2 cups all-purpose flour
½ teaspoon salt
1 teaspoon cinnamon
½ teaspoon fennel pollen
1 cup unsalted butter, melted


Store in the freezer until you’re ready to bake.

Pre-heat oven to 350 degrees. Prepare fruit. Toss with a little flour and sugar. Arrange in a baking dish lightly coated in baking spray or vegetable oil. Top with enough crisp mixture to cover the fruit. Store remaining crisp mixture in the freezer.

Bake for about 40 minutes or until fruit is bubbly and the topping is browned.


Happy Thanksgiving, everyone!

Print Page

Tuesday, June 2, 2015

Easy as Pie at Bake Sale Bakery Class


There's clearly something I find addictive about pie baking. It's not just that I love to make them. It's that I can't stop learning how to make them from the experts. First there was my Nana Tillie, who had me rolling out dough for Thanksgiving apple and pumpkin pies when I was a kid. Much later I took classes at Great News!. Several years ago it got downright crazy--in a good way. Baker Rachel Caygill taught a class that highlighted her butter and lard recipe and technique. Michele Coulon of Michele Coulon Dessertier taught me her strictly butter approach. I got teased with techniques (but no recipe) by my buddy Elizabeth Harris of Betty's Pie Whole. And last summer I took a pie-making class that's part of the culinary degree curriculum pastry chef Tina Luu teaches at the Art Institute of San Diego.


You'd think I'd have had my fill--but no. When I learned that Kathleen Shen of Bake Sale Bakery teaches baking classes and that a pie-making class was coming up, well, I signed up, curious to see what more I could learn. And my intent that evening was to do what I often do at cooking classes when I'm going to write about them. Hover and take notes and photos. But Shen is an irresistible instructor and I found myself with a dusty camera by the end of the class because I couldn't keep from participating.

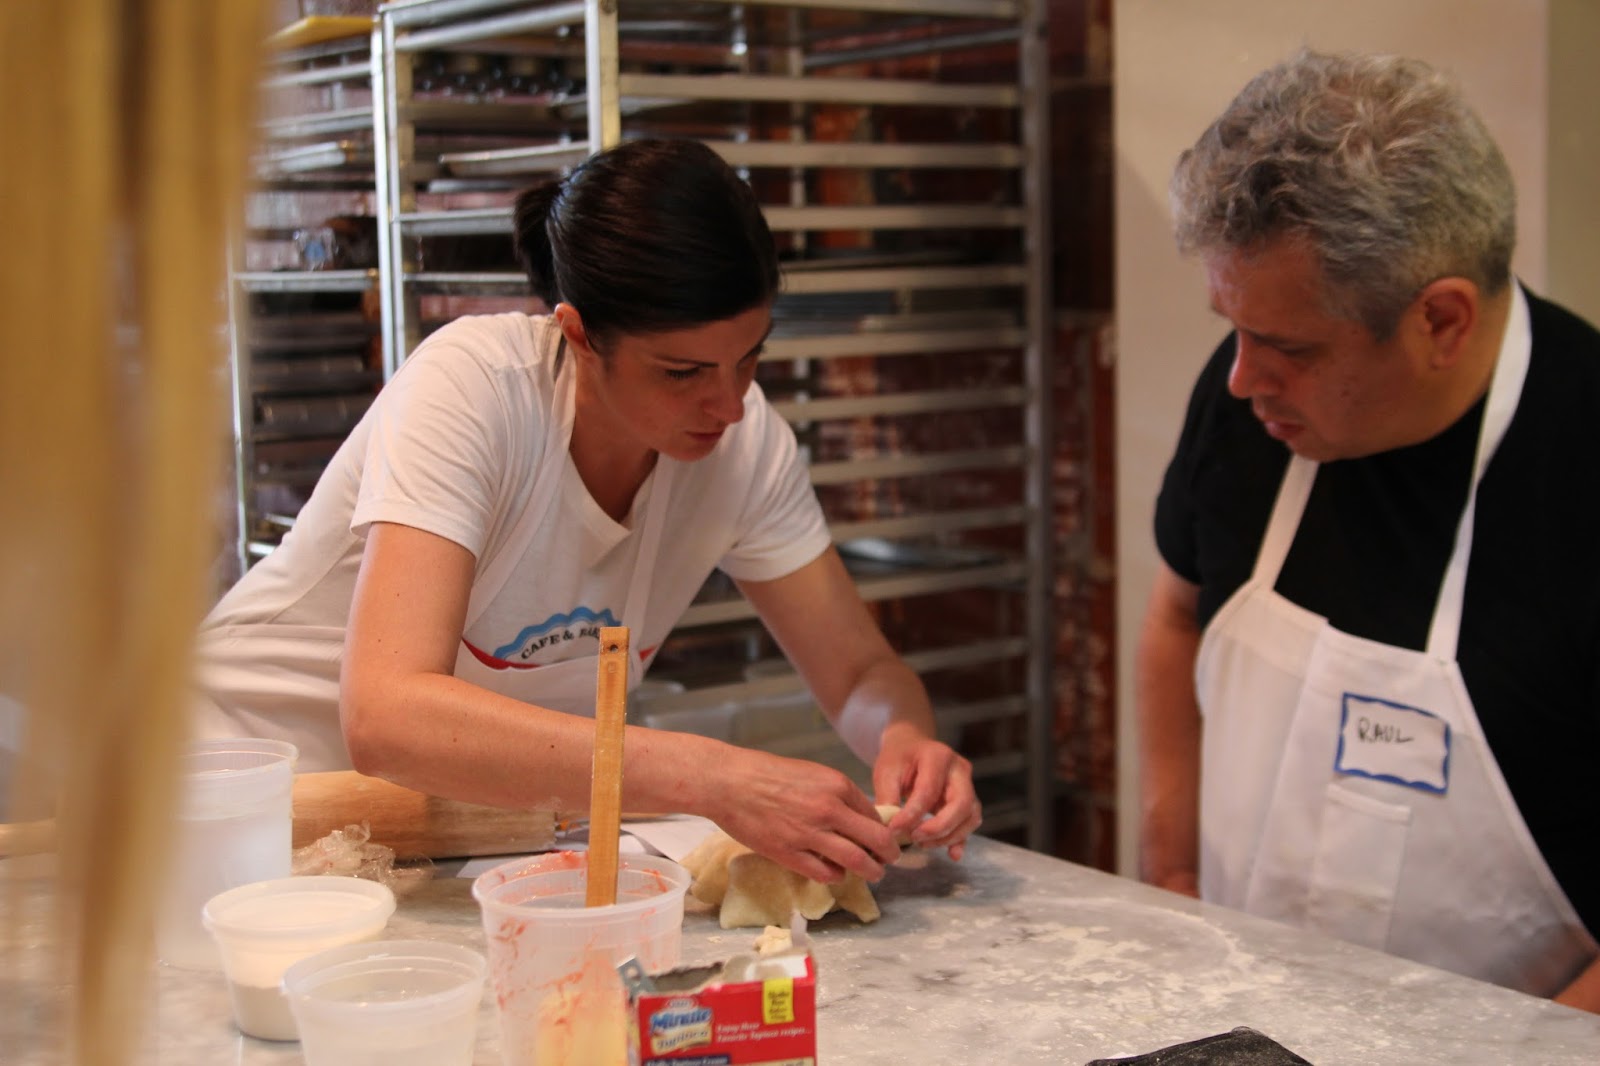
The class is intimate. Six students around a large marble-topped table. What's so brilliant about it is that it's both hands on and demo. Shen and her boss, owner Terryl Gavre, have figured out what concepts--like making the dough and piping meringue--students need to do at that moment and what can be done in advance and simply explained, along with a fulsome recipe. So, we learned technical skills and we learned why we do what we do so that, as Shen explained, we can figure out how to fix things when they go wrong. That's powerful knowledge in the kitchen.


We started out making a basic pie dough, of course. Shen likes the classic blending of butter (for flakiness and flavor) and shortening (for tenderness). She explained the science behind keeping the ingredients cold and why you want to have packets of fat. "You don't want to work all the fat into the flour," she explains. "You want those pieces of fat because they create pockets of steam and thus flakiness. And you want to minimize how much you work the dough to avoid developing gluten. Then the dough gets tough. Instead, it should just hold together."


Through the process of mixing it ourselves we learned how it should feel. Our dough, which we pressed into a disk, went into the fridge to cool. Then, with pre-made dough disks, we learned how to roll it out--always a source of anxiety. Shen's technique worked for me. Brush with flour and let the rolling pin do the work, not my arms. Roll. Turn it a quarter. Roll. Turn. Roll. Turn. You end up with a nice evenly rolled circle that doesn't stick to the surface. (For extra flaky dough, you can also fold your rolled out dough into quarters and roll it out again--like laminating dough for croissants or puff pastry.) Fold the now large circle  gently into quarters and lift it into the pie plate. Unfold. Press into the plate and that's it. Sure made me look good.

She taught us great tips for how to blind bake dough for pies with liquid fillings, like lemon meringue and chocolate cream. She taught us how to effectively add a second, top crust to a fruit pie so the edges would be both pretty and contain the filling. (Fold the top dough over the bottom at the edge, press to close, then crimp.)


Shen also gave us tips for creating novel crusts. Instead of graham cracker crust for our chocolate cream pie, she gave us a primer in making a cookie crust. Make a chocolate chip cookie dough, sans the chips, bake it, run it through the food processor to get the crumbs, and add sugar and butter. Then press into the pie tin and refrigerate until ready to use. Want to add some extra structure to a pie dough for lemon meringue? Instead of rolling the dough out with flour, use graham cracker crumbs.


We then learned techniques for making chocolate cream and lemon curd for our pie fillings. On individual propane burners we each prepared our chocolate cream after Shen demonstrated the technique. We poured the cream into our already prepared cookie crusts. Then she did a demo for the lemon curd and taught us how to make meringue, offering some great tips. (Use a clean bowl and room-temperature egg, add cream of tartar to relax the whites and only add sugar once there's volume in the whites.) Then we each had to each use a pastry bag with a tip to pipe it onto our lemon meringue pies, which then went into the oven.


We did all this in just over two hours. And we got to take everything home with us that we'd made: our chilled unbaked dough, an uncooked but oven-ready strawberry rhubarb pie, our chocolate cream pie just needing whipped cream, and our stunning lemon meringue masterpieces. Plus recipes.

Since lemon meringue pie is my mom's absolute favorite, I took it over to her the next day. She only allowed me a small bite, but it was terrific. Even overnight the crust remained flaky and the meringue stiff. The lemon filling was a perfect melding of tart and sweet. My mom says that she doled out small pieces to herself for a couple of days and even with the last piece the crust remained solid, not mushy. So, we've got splendid recipes and techniques here!


I'm feeling even more confident now.

Bake Sale Bakery holds a variety of pastry classes year round. To find see their schedule, go to http://bakesalesd.com/events/category/classes/.


Print Page

Tuesday, August 12, 2014

Chocolate Cream Pie with Tough Culinary Love on the Side from Pastry Chef/Instructor Tina Luu


I first met Tina Luu in 2008, when I was researching a roundup of holiday sweets for an appearance on KPBS, which I then turned into a post for San Diego Foodstuff. At the time she was the chef at Heaven Sent in North Park and, no surprise to those who know her, she plied me with taste after taste of remarkable, decadent holiday pastries. In the years since we've become good friends. Going out for a meal with Tina is an experience in extravagance. Typically, at a meal at Bankers Hill not long after it opened, we had our savory dishes and then, with a wink, Tina ordered the entire dessert menu for us to try. Delicious insanity.

You see nothing of that impishness in the classes she teaches at The International Culinary Schools at The Art Institute in Mission Valley. There she's all business and sharp-eyed focus. I've been trying to wrangle an invitation for years to see what she does and finally got to attend her Pies and Tarts class last week. The four-hour class begins with a quiz from the previous lesson and then Tina begins a short lecture to her 25 students on the topic at hand. On that day, she launched into the differences between tart and pie doughs, how to create a flaky pie crust, the three ways to use pie dough, types of fillings, the three types of tart dough, and where puff pastry fits in with all this. She worked in French terminology, health issues related to ingredients like Crisco and lard, and environmental concerns.


Then she began the demos, simultaneously working on a pie crust and pastry cream. Sure, you may have recipes. But the nuggets and gems of information--and corresponding tastes--make these sessions the essence of education--like using a combination of vanillas, both bean and extract, to create layers of flavor; like using other extract flavors such as coffee; like making sure to use just your fingertips when cutting in the butter and shortening so as not to melt the fats; like how to temper the pastry cream; like being sure to always strain pastry cream to get rid of particles; like placing plastic wrap on top of the finished pastry cream before refrigerating it to avoid forming a skin.

Pastry chefs are, of course, the epitome of precision. She circled around the classroom as her students got to work on their pie and tart doughs correcting technique, nudging them where needed, praising where deserved. And the students seem to thrive on this tough love. I was getting off on it, too. Sure, I knew Tina as a gifted pastry chef, but seeing her teach was something else. These students and I were in the hands of a consummate professional--one who lives up to an impressive resume that includes working with world-class chefs like Michael Mina and Jeremiah Tower, working in Asia with the Stars Restaurant group, lecturing at the Culinary Institute of the Pacific at the University of Hawaii, and contributing as a writer and photographer at Gusto Magazine.

As part of my mini class experience I also got a couple of recipes--one for pie dough and another for chocolate pastry cream so you can make a chocolate cream pie. The dough recipe will make six patons--or 10-ounce pie crusts. Tina came to this measurement as a way to avoid waste. You'll have just enough to create a crust for an aluminum pie tin that will shouldn't need to be trimmed. Making six will allow you to freeze whatever you don't need. I've got two in my freezer now, thanks to one of her very sweet and charming students. Want to make a pie? Just pull out a paton or two and defrost overnight in the fridge or for 20 minutes at room temperature.

Flaky Pie Dough
Tina Luu
(printable recipe)
Yield: 6 patons

Ingredients
1 pound, 8 ounces all purpose flour
10 ounces pastry flour
1/2 cup granulated sugar
1/2 tablespoon salt
1 pound cold butter, cut into big chunks
7 ounces Crisco
1 3/4 cup ice water

Sift together dry ingredients. By hand, cut in cold butter and shortening until they are a mix of fava bean and pea size.


Add water, starting with 1 1/2 cups and only adding more as necessary. Add too much water and you'll have dense dough that won't rise and will look a little gray. Mix until the dough just comes together. It should be rough with striations of butter.


Scale (measure each piece so it weighs 10 ounces) and form patons into a short square that will make it easier to roll out later. Wrap individually in plastic wrap and chill at least two hours but preferably overnight. Or put them in the freezer.

When you're ready to make the pie, flour your surface and roll out the paton until it's 1/6th of an inch thick. If you're making a cream pie, you'll do a blind bake--meaning you'll place the dough into the pie tin and add weights like beans. Bake at 350˚ for 15 minutes or until golden. Remove the weights and bake for another 10 minutes. Let cool, then fill with the pastry cream.


Tina's Crème Patissiere/Pastry Cream
Tina Luu
(printable recipe)
Yield: 2 pies

We're adding unsweetened chocolate here to make a chocolate cream pie, but you can leave out the chocolate for a basic pastry cream that you can use for all sorts of applications, including fruit tarts.

Ingredients
1 quart whole milk
12 ounces granulated sugar
1/4 vanilla bean, seeds scraped (use both seeds and bean)
6 eggs
3.5 ounces granulated sugar
3.5 ounces cornstarch
1 teaspoon vanilla extract
3.5 ounces cold butter
3 ounces unsweetened chocolate

Create a slurry by combining eggs, 3.5 ounces sugar, 1 cup of milk, and cornstarch. Bring to a boil remaining milk, sugar, and vanilla bean, then lower the heat. Temper in egg mixture by adding five ladle fulls of the hot liquid to the cold and then adding the now warmed up mixture to the hot liquid, constantly stirring. This prevents the eggs from curdling.


Bring the mixture back to a boil, stirring constantly but gently as the mixture thickens to a cream. Be sure the bottom doesn't burn. You'll feel it coagulating. Keep stirring to smooth it out. Once it first bubbles (at 212˚), cook for an additional three minutes. Add butter, vanilla extract, and chocolate and mix well. Strain through a sieve. Cover the surface with plastic wrap and refrigerate.


To put the pie together, gently fill the baked crust with the pastry cream. You can then pipe whipped cream on top and garnish with shaved chocolate. To make whipped cream, whip together two cups heavy cream, 1/4 cup powder sugar, and 1 tablespoon vanilla.


*Bottom two photos courtesy Tina Luu


Print Page

Wednesday, May 23, 2012

Vivace at the Aviara: When Brunch is a Long, Leisurely Lunch

There was a time when I would drool at the prospect of an expansive hotel Sunday brunch. I'd hit the omelet station for big gooey cheesy guac-packed egginess. Then I'd load up on oysters, pile lox on mini bagels with cream cheese, surreptitiously shove slices of bacon in my mouth while canvassing the rest of the offerings. It was bad. And now, of course, I don't even desire it.

So when I learned about the new Sunday meal that Vivace at the Park Hyatt Aviara Resort launched last month--essentially brunch that isn't brunch--I was intrigued. They call it pranzo, which means lunch in Italian and what they have in mind is a leisurely, family-style midday meal, Italian style.

Mozzarella and Antipasti Bar
There are only three all-you-can-eat stations. Well, four if you count the house-made desserts.

When you first walk in through the breezeway there's the crudo bar with Carlsbad Aqua Farm oysters, Caledonian prawns, shrimp, Octopus salad, and Skuna Bay salmon.


Then there's the Burrata Bar, where chef de cuisine Jesse Paul makes mozzarella and burrata using warm salty water held in an induction burner into which he adds cheese curd. The curd melts and Paul removes it, stretching the curd until it forms a shiny mass. He folds it into a ball, tucking it into itself from the bottom, then shocks it in ice water to set, even as the inside remains nice and warm. Yes, he does all this in front of diners, explaining the process throughout. 


Accompanying the cheese was a tangy teardrop tomato salad, olives, a red pepper salad, a beautiful fennel and orange salad, mushroom Parmesan salad, roasted asparagus, pickled garlic cloves, and a selection of breads.


Finally, there's the Artisan Salumi Bar--a dangerous place for me what with Lonzo, Picante Salami, Coppa, and Prosciutto all available, along with cheeses such as the soft Robiola Tre Latti and Pecorino Toscano. I loved the pickled strawberries and candied walnuts, too. And the honeycomb was a nice touch.


This is the kind of food that's meant for sharing, which I did with my two friends. But it's just the prelude to a true family meal because they also have a menu for the main course and sides that are served family style on platters. Yes, they have ravioli and rigatoni, but we ordered the Waygu Flat-Iron steak with Red Wine Mostardo, the Wood Roasted Jidori Chicken with Fruit Mostardo, and the Roasted Sea Bass served with grilled Meyer lemon, capers, and brodo.


All three were light, juicy--even succulent. I especially enjoyed the sea bass, with its tender flesh and very crispy, decadent skin topped by the capers.

We had to order all the sides. There just wasn't one we could discard. So, out came caramalized cauliflower with anchony, currants, and pine nuts; creamy polenta, roasted peewee potatoes seasoned with rosemary and garlic; and a melange of English peas, asparagus, and spring garlic.


As you can see, the portions are modest. It's plenty for sharing, particularly after feasting at the appetizer tables. And, the food is fairly light. So, you don't leave feeling bloated and uncomfortable, even if--as we did--you linger over your Sunday meal for three hours.

When you dine with a pastry chef--in this case, Tina Luu--you sample all desserts. So between us, we, chef Amiko Gubbins, too, probably sampled everything. I recommend the Torta di Cioccolato e Nutella (chocolate Nutella tart), which was rich but not too sweet, the Zuppa Inglese, the Cannoli alla Ricotta, and the Panna Cotta alle Fragole.


Vivace uses local produce from Peterson, Crows Pass, and Valdivia Farms. The cheeses are imported from Italy, and the salamis are a mix of local (Angel Salumi based in Encinitas) and Italian imports.

With your meal, you're served glasses of Prosecco, but you also have a few cocktail choices. Altogether, it's $45 for the meal, which is served from 11:30 a.m. to 3 p.m. And valet parking is free with validation. We sat indoors, but next time, I'd choose a table on the balcony with its splendid ocean view.

Vivace is located in the Park Hyatt Aviara Resort at 7100 Aviara Resort Dr.

Print Page

Tuesday, November 1, 2011

Pie Making with Rachel Caygill of Bankers Hill


We're heading into holiday pie-making season so when pastry chef Rachel Caygill invited me to her house, where she was hosting a group called the San Diego Food Bloggers for a pie-making class, I had to go. See, Rachel is the superb pastry chef at Bankers Hill Bar and Restaurant, where her husband Scott is the chef de cuisine. I love to go there with my friend Tina Luu, also an extraordinary pastry chef and someone who never orders one dessert off the menu but all of them. So, I've tasted many of Rachel's creations, including her pies. And I wanted to learn her secrets.

Now, this is really going to be more of a pictorial post because so much of pie making is technique and watching Rachel take us through creating the crust for an apple pie was fascinating. But, it's not easy. It involves a lot of physical effort. Rachel throws her whole body into the rolling process. But the results -- a rich crispy and flaky crust encasing a bright apple filling layered in spices -- is so worth the effort. I've also got a number of tips from her that I'm including with the photos. Her apple pie recipe will follow below.

So the first thing you'll notice is that instead of mixing the flour and butter in a food processor to break up the butter, Rachel is rolling slices of it into the flour. Gluten doesn't form until you add water so no worries about over working it. The flour is a half-and-half combo of all purpose and cake flours. After a lot of trial and error over the years, she's settled on a 3-2-1 ratio of flour, fat, and liquid, with a teaspoon of salt per pound of flour. 

Still a little chunky. Then she cuts in lard. Her ratio is 3-to-1 butter/lard.

Rachel then makes a hole in the middle of the flour/fat for a well she fills with water (similar to making pasta).

This gets tricky because the water wants to escape. But use a scraper to pull the flour into the water (and to retrieve the errant water) to form a loose dough.
Rachel pats the dough into a square and then starts rolling to incorporate the ingredients.


Keep the dough moving to prevent sticking and put your whole body into it. It'll grow long. Use the scraper pick up the ends and fold it back into a square and roll it again. You'll do this two to three times.

She's not seeking perfection here, just for the ingredients to begin to come together. For now, the aim is to shape what looks like a loaf.

And, here's the beginning of the loaf.
This goes into the refrigerator to chill and rest for 20 minutes. Or, you can freeze it for later (defrost overnight in the fridge).

The now rested and chilled dough is ready to be rolled out. Rachel cut off a chunk to make the first crust. You can see layers of unincorporated fat. This will help make for a crispy crust. Rachel helps ease the rolling process by pushing the dough out with the heels of her hand. Again, full body work.

Rachel admits she can't roll the dough into a circle -- and doesn't even try. But she says to roll from the middle, keep the dough moving, and flip it over to keep it from sticking.

Rachel rolls the dough onto the rolling pin and eases it over the pie plate. (She uses oversized pie plates that she finds at places like Target.) It's best to have lots of overlap for trimming and rolling the edges.

In goes the filling.

Next comes the top crust and the beginning of crimping the edges. Rachel trims the overhang with scissors. See how the edges of the crust layers align and she folds them together, under, and then down into the side of the pie plate.
Like that. With well-floured hands, she pushes the dough between two fingers for this crimping effect.
Rachel brushes the top with an eggwash, followed by a generous sprinkling of granulated superfine sugar she stores in an airtight container thick with fragrant vanilla beans. Make slits in the top crust to create vents (and separate the vent sides a little to let the air escape so the liquid from cooking apples evaporates. Then bake low and slow -- say, 375˚ for half an hour, then lower the temp to 325˚ for another hour (but this depends on your oven; you may need to start at 400˚). Her reasoning is that it helps the juices evaporate and prevents the top crust from burning. So you get a golden, crispy crust on top, avoid a soggy bottom crust, and create a firm filling.
Cool under pressure with a gorgeous apple pie.
Remember low and slow keeps the filling intact, as you can see here.
A slice of heaven... 
Apple Pie
by Rachel Caygill*
(Printable recipe here)

Rachel Caygill loves cardamom and includes the floral spice in her apple pie filling, blended with cinnamon, ginger, clove, allspice and nutmeg mixed with sweet and tart apples -- in this case Granny Smiths and Fujis. And the crust? Well, the top crackled between my teeth and I loved the thick crisp sides that had been crimped to perfection. This is the pie you want to serve at your Thanksgiving dinner.

*The ingredients and amounts are Rachel's. The instructions are mine based on her directions during the class.

Pie Crust Ingredients
(for two crusts)

15 ounces flour (half all purpose, half cake)
10 ounces fat (7.5 ounces butter, 2.5 ounces lard)
5 ounces water
1 teaspoon salt

1 egg yolk
2 tablespoons milk
1/4 cup superfine sugar

Combine the flour and salt. Spread the flour mixture on the counter or a cold marble tile and cut the butter into it. Then roll the butter into the flour. Use a scraper to chop up some of the flour and roll a little more to incorporate. Then cut the lard into the mixture.

Make a well in the flour/fat mixture and add the water into the middle. Scrape the flour/fat into the water to create loose dough. When the dough is formed, roll it out into an rectangle, then fold into thirds and roll again. Repeat once more if necessary and shape into a loaf. Refrigerate for 20 minutes and make pie filling.

Preheat the oven to 375˚. Cut the dough roughly in half -- one part should be a little larger for the bottom crust. Roll out that piece large enough to fill the pie plate with a couple of inches overhang. Gently place the dough into the pie plate, then add filling. Roll out the top crust large enough to hang over the the filling and bottom crust overhang. Trim the edges of the crust to even out. Then holding the edges of both crusts, fold under together and tuck into the pie plate. Crimp the edges between two fingers.

Make the eggwash by mixing together the yolk and milk. Brush onto the top crust. Sprinkle the sugar on top. Then slice vents into the top crust and spread the edges slightly. Bake at 375˚ for half an hour, then lower the temperature to 325˚ and bake for another hour until the crust is brown and thick juices run out.

Apple Filling Ingredients

2 pounds apples, peeled, cored, and thinly sliced (use a combination of sweet and tart varieties)
6 ounces sour cream
2 tablespoons unsalted butter, cut into chunks
3 tablespoons cornstarch
8 ounces dark brown sugar
4 ounces granulated sugar
1 vanilla bean, seeds scraped -- or 2 teaspoons vanilla extract
zest from half an orange
1 tablespoon cinnamon
1 1/2 teaspoon cardamom
1 teaspoon ground ginger
1/2 teaspoon nutmeg
1/8 teaspoon clove
1/8 teaspoon allspice

Combine all ingredients in large bowl, then add on top of bottom crust.

Print Page