Showing posts with label The Art Institute. Show all posts

Tuesday, June 2, 2015

Easy as Pie at Bake Sale Bakery Class


There's clearly something I find addictive about pie baking. It's not just that I love to make them. It's that I can't stop learning how to make them from the experts. First there was my Nana Tillie, who had me rolling out dough for Thanksgiving apple and pumpkin pies when I was a kid. Much later I took classes at Great News!. Several years ago it got downright crazy--in a good way. Baker Rachel Caygill taught a class that highlighted her butter and lard recipe and technique. Michele Coulon of Michele Coulon Dessertier taught me her strictly butter approach. I got teased with techniques (but no recipe) by my buddy Elizabeth Harris of Betty's Pie Whole. And last summer I took a pie-making class that's part of the culinary degree curriculum pastry chef Tina Luu teaches at the Art Institute of San Diego.


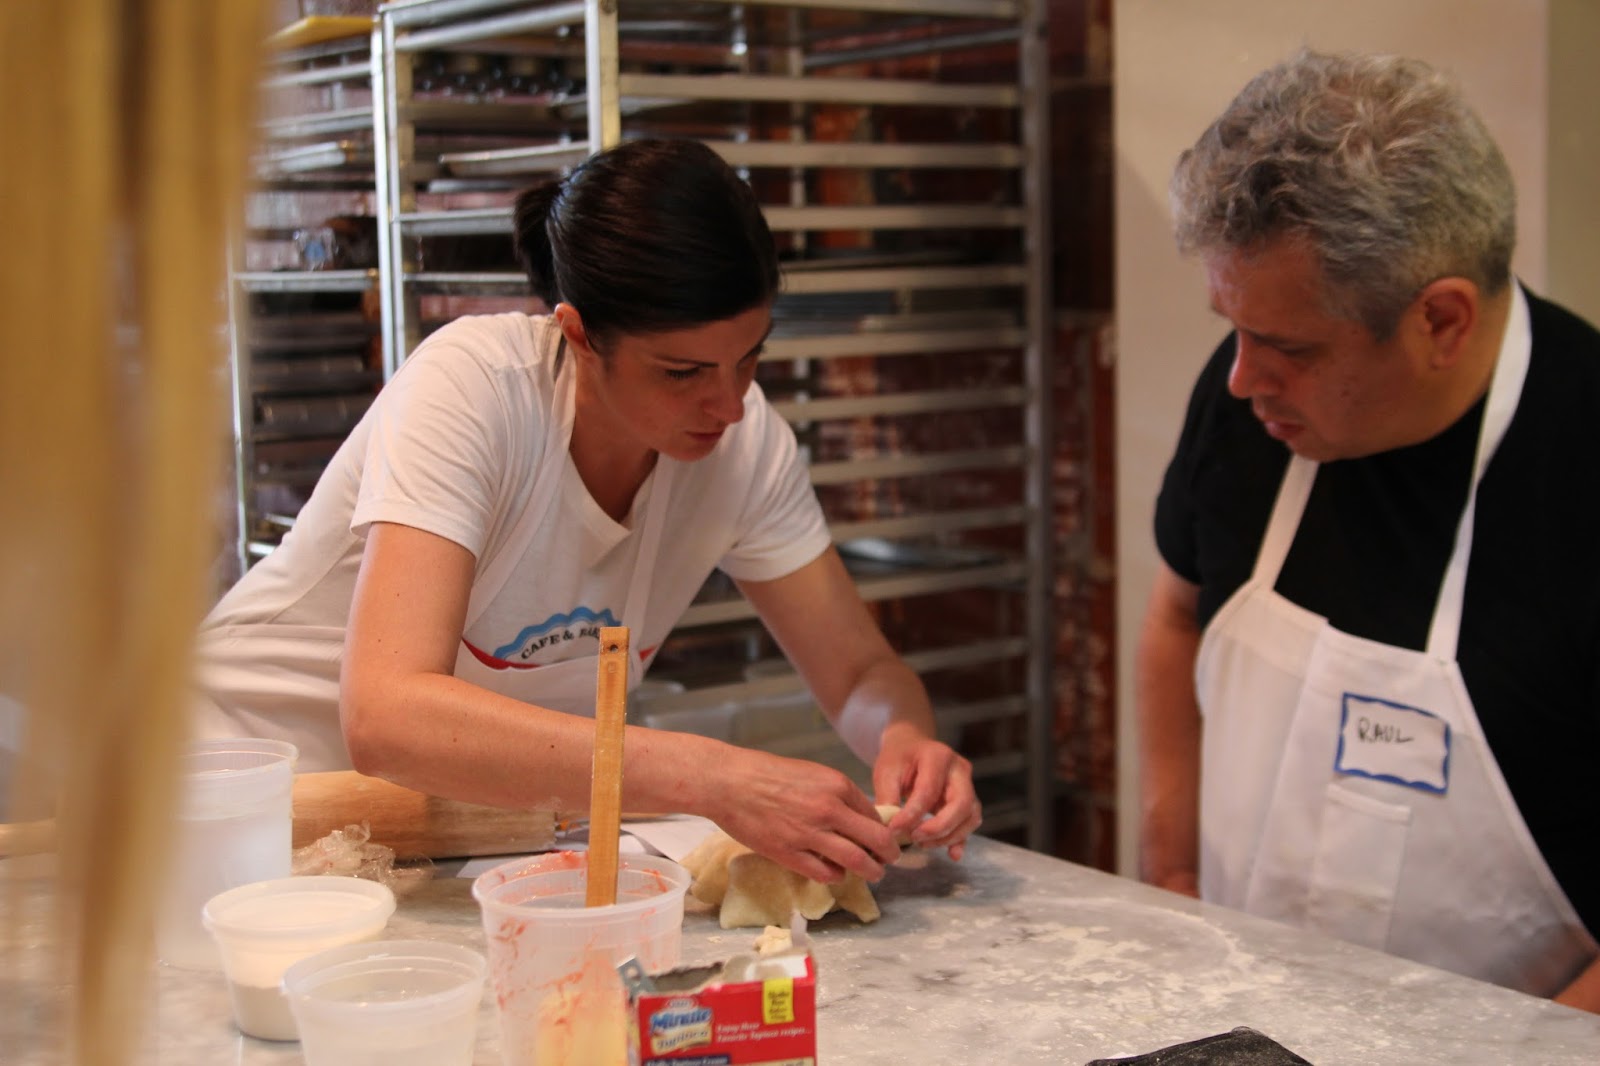
You'd think I'd have had my fill--but no. When I learned that Kathleen Shen of Bake Sale Bakery teaches baking classes and that a pie-making class was coming up, well, I signed up, curious to see what more I could learn. And my intent that evening was to do what I often do at cooking classes when I'm going to write about them. Hover and take notes and photos. But Shen is an irresistible instructor and I found myself with a dusty camera by the end of the class because I couldn't keep from participating.

The class is intimate. Six students around a large marble-topped table. What's so brilliant about it is that it's both hands on and demo. Shen and her boss, owner Terryl Gavre, have figured out what concepts--like making the dough and piping meringue--students need to do at that moment and what can be done in advance and simply explained, along with a fulsome recipe. So, we learned technical skills and we learned why we do what we do so that, as Shen explained, we can figure out how to fix things when they go wrong. That's powerful knowledge in the kitchen.


We started out making a basic pie dough, of course. Shen likes the classic blending of butter (for flakiness and flavor) and shortening (for tenderness). She explained the science behind keeping the ingredients cold and why you want to have packets of fat. "You don't want to work all the fat into the flour," she explains. "You want those pieces of fat because they create pockets of steam and thus flakiness. And you want to minimize how much you work the dough to avoid developing gluten. Then the dough gets tough. Instead, it should just hold together."


Through the process of mixing it ourselves we learned how it should feel. Our dough, which we pressed into a disk, went into the fridge to cool. Then, with pre-made dough disks, we learned how to roll it out--always a source of anxiety. Shen's technique worked for me. Brush with flour and let the rolling pin do the work, not my arms. Roll. Turn it a quarter. Roll. Turn. Roll. Turn. You end up with a nice evenly rolled circle that doesn't stick to the surface. (For extra flaky dough, you can also fold your rolled out dough into quarters and roll it out again--like laminating dough for croissants or puff pastry.) Fold the now large circle  gently into quarters and lift it into the pie plate. Unfold. Press into the plate and that's it. Sure made me look good.

She taught us great tips for how to blind bake dough for pies with liquid fillings, like lemon meringue and chocolate cream. She taught us how to effectively add a second, top crust to a fruit pie so the edges would be both pretty and contain the filling. (Fold the top dough over the bottom at the edge, press to close, then crimp.)


Shen also gave us tips for creating novel crusts. Instead of graham cracker crust for our chocolate cream pie, she gave us a primer in making a cookie crust. Make a chocolate chip cookie dough, sans the chips, bake it, run it through the food processor to get the crumbs, and add sugar and butter. Then press into the pie tin and refrigerate until ready to use. Want to add some extra structure to a pie dough for lemon meringue? Instead of rolling the dough out with flour, use graham cracker crumbs.


We then learned techniques for making chocolate cream and lemon curd for our pie fillings. On individual propane burners we each prepared our chocolate cream after Shen demonstrated the technique. We poured the cream into our already prepared cookie crusts. Then she did a demo for the lemon curd and taught us how to make meringue, offering some great tips. (Use a clean bowl and room-temperature egg, add cream of tartar to relax the whites and only add sugar once there's volume in the whites.) Then we each had to each use a pastry bag with a tip to pipe it onto our lemon meringue pies, which then went into the oven.


We did all this in just over two hours. And we got to take everything home with us that we'd made: our chilled unbaked dough, an uncooked but oven-ready strawberry rhubarb pie, our chocolate cream pie just needing whipped cream, and our stunning lemon meringue masterpieces. Plus recipes.

Since lemon meringue pie is my mom's absolute favorite, I took it over to her the next day. She only allowed me a small bite, but it was terrific. Even overnight the crust remained flaky and the meringue stiff. The lemon filling was a perfect melding of tart and sweet. My mom says that she doled out small pieces to herself for a couple of days and even with the last piece the crust remained solid, not mushy. So, we've got splendid recipes and techniques here!


I'm feeling even more confident now.

Bake Sale Bakery holds a variety of pastry classes year round. To find see their schedule, go to http://bakesalesd.com/events/category/classes/.


Print Page

Tuesday, August 12, 2014

Chocolate Cream Pie with Tough Culinary Love on the Side from Pastry Chef/Instructor Tina Luu


I first met Tina Luu in 2008, when I was researching a roundup of holiday sweets for an appearance on KPBS, which I then turned into a post for San Diego Foodstuff. At the time she was the chef at Heaven Sent in North Park and, no surprise to those who know her, she plied me with taste after taste of remarkable, decadent holiday pastries. In the years since we've become good friends. Going out for a meal with Tina is an experience in extravagance. Typically, at a meal at Bankers Hill not long after it opened, we had our savory dishes and then, with a wink, Tina ordered the entire dessert menu for us to try. Delicious insanity.

You see nothing of that impishness in the classes she teaches at The International Culinary Schools at The Art Institute in Mission Valley. There she's all business and sharp-eyed focus. I've been trying to wrangle an invitation for years to see what she does and finally got to attend her Pies and Tarts class last week. The four-hour class begins with a quiz from the previous lesson and then Tina begins a short lecture to her 25 students on the topic at hand. On that day, she launched into the differences between tart and pie doughs, how to create a flaky pie crust, the three ways to use pie dough, types of fillings, the three types of tart dough, and where puff pastry fits in with all this. She worked in French terminology, health issues related to ingredients like Crisco and lard, and environmental concerns.


Then she began the demos, simultaneously working on a pie crust and pastry cream. Sure, you may have recipes. But the nuggets and gems of information--and corresponding tastes--make these sessions the essence of education--like using a combination of vanillas, both bean and extract, to create layers of flavor; like using other extract flavors such as coffee; like making sure to use just your fingertips when cutting in the butter and shortening so as not to melt the fats; like how to temper the pastry cream; like being sure to always strain pastry cream to get rid of particles; like placing plastic wrap on top of the finished pastry cream before refrigerating it to avoid forming a skin.

Pastry chefs are, of course, the epitome of precision. She circled around the classroom as her students got to work on their pie and tart doughs correcting technique, nudging them where needed, praising where deserved. And the students seem to thrive on this tough love. I was getting off on it, too. Sure, I knew Tina as a gifted pastry chef, but seeing her teach was something else. These students and I were in the hands of a consummate professional--one who lives up to an impressive resume that includes working with world-class chefs like Michael Mina and Jeremiah Tower, working in Asia with the Stars Restaurant group, lecturing at the Culinary Institute of the Pacific at the University of Hawaii, and contributing as a writer and photographer at Gusto Magazine.

As part of my mini class experience I also got a couple of recipes--one for pie dough and another for chocolate pastry cream so you can make a chocolate cream pie. The dough recipe will make six patons--or 10-ounce pie crusts. Tina came to this measurement as a way to avoid waste. You'll have just enough to create a crust for an aluminum pie tin that will shouldn't need to be trimmed. Making six will allow you to freeze whatever you don't need. I've got two in my freezer now, thanks to one of her very sweet and charming students. Want to make a pie? Just pull out a paton or two and defrost overnight in the fridge or for 20 minutes at room temperature.

Flaky Pie Dough
Tina Luu
(printable recipe)
Yield: 6 patons

Ingredients
1 pound, 8 ounces all purpose flour
10 ounces pastry flour
1/2 cup granulated sugar
1/2 tablespoon salt
1 pound cold butter, cut into big chunks
7 ounces Crisco
1 3/4 cup ice water

Sift together dry ingredients. By hand, cut in cold butter and shortening until they are a mix of fava bean and pea size.


Add water, starting with 1 1/2 cups and only adding more as necessary. Add too much water and you'll have dense dough that won't rise and will look a little gray. Mix until the dough just comes together. It should be rough with striations of butter.


Scale (measure each piece so it weighs 10 ounces) and form patons into a short square that will make it easier to roll out later. Wrap individually in plastic wrap and chill at least two hours but preferably overnight. Or put them in the freezer.

When you're ready to make the pie, flour your surface and roll out the paton until it's 1/6th of an inch thick. If you're making a cream pie, you'll do a blind bake--meaning you'll place the dough into the pie tin and add weights like beans. Bake at 350˚ for 15 minutes or until golden. Remove the weights and bake for another 10 minutes. Let cool, then fill with the pastry cream.


Tina's Crème Patissiere/Pastry Cream
Tina Luu
(printable recipe)
Yield: 2 pies

We're adding unsweetened chocolate here to make a chocolate cream pie, but you can leave out the chocolate for a basic pastry cream that you can use for all sorts of applications, including fruit tarts.

Ingredients
1 quart whole milk
12 ounces granulated sugar
1/4 vanilla bean, seeds scraped (use both seeds and bean)
6 eggs
3.5 ounces granulated sugar
3.5 ounces cornstarch
1 teaspoon vanilla extract
3.5 ounces cold butter
3 ounces unsweetened chocolate

Create a slurry by combining eggs, 3.5 ounces sugar, 1 cup of milk, and cornstarch. Bring to a boil remaining milk, sugar, and vanilla bean, then lower the heat. Temper in egg mixture by adding five ladle fulls of the hot liquid to the cold and then adding the now warmed up mixture to the hot liquid, constantly stirring. This prevents the eggs from curdling.


Bring the mixture back to a boil, stirring constantly but gently as the mixture thickens to a cream. Be sure the bottom doesn't burn. You'll feel it coagulating. Keep stirring to smooth it out. Once it first bubbles (at 212˚), cook for an additional three minutes. Add butter, vanilla extract, and chocolate and mix well. Strain through a sieve. Cover the surface with plastic wrap and refrigerate.


To put the pie together, gently fill the baked crust with the pastry cream. You can then pipe whipped cream on top and garnish with shaved chocolate. To make whipped cream, whip together two cups heavy cream, 1/4 cup powder sugar, and 1 tablespoon vanilla.


*Bottom two photos courtesy Tina Luu


Print Page